In this tutorial you will learn how to blend different images together using adjustment layers and simple but effective photo realistic illustrations.
Resources Used (The following resources were used during the production of this tutorial.):
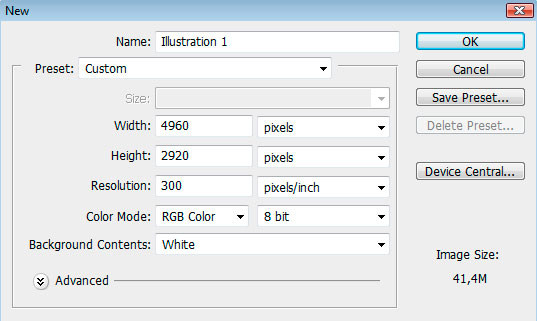
Step 1
Make a new document, sized 4960 x 2920 px, resolution 300.
Step 2
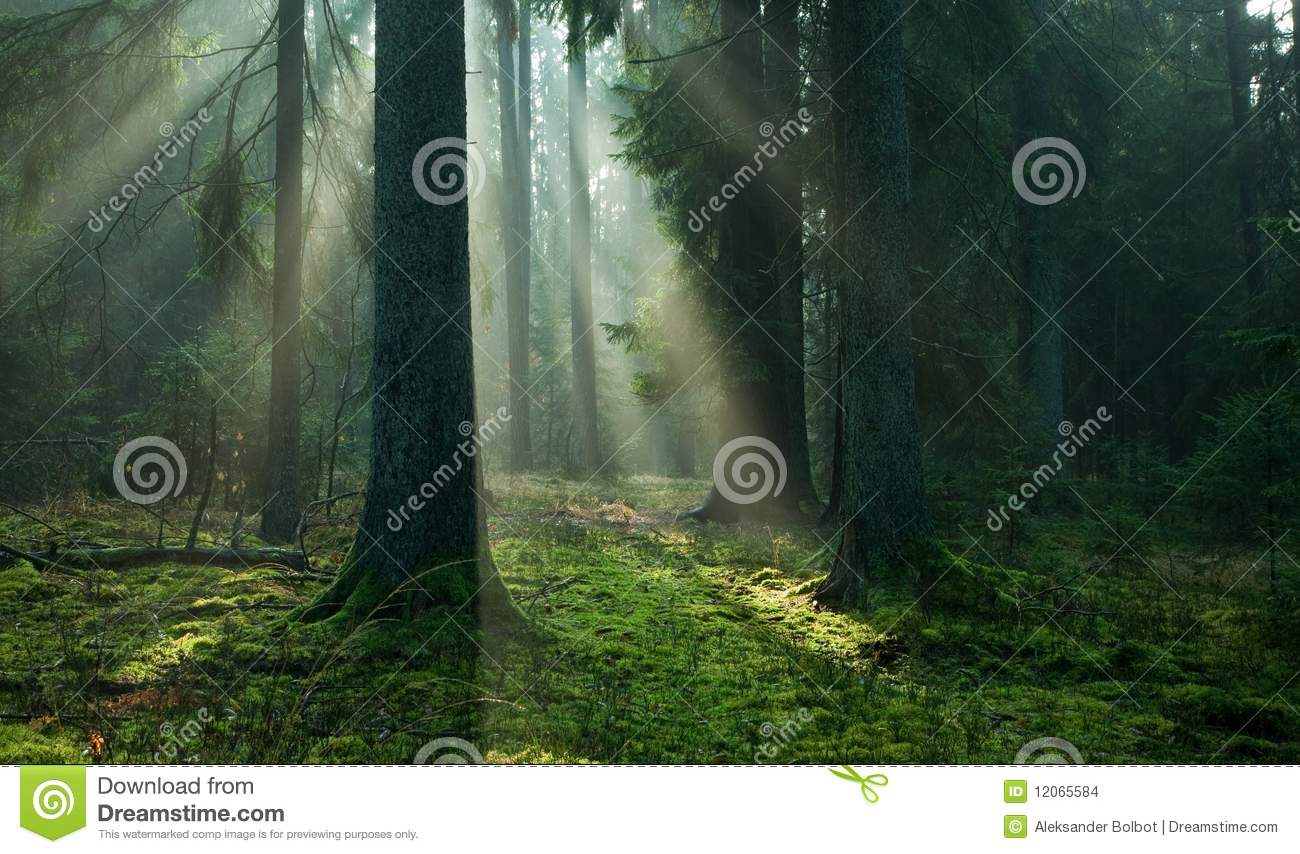
Add the picture of a forest and name the layer. Use free transform (Cmd+T), hold down Shift and draw the image to cover the whole canvas.
Step 3
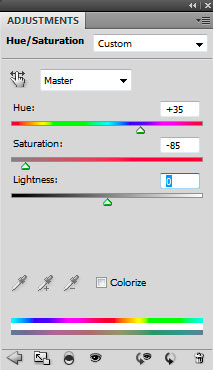
Now add adjustment layers for the forest layer. Use Layer > New Adjustment Layer > Hue/Saturation and bring down the master saturation to -85.
Step 4
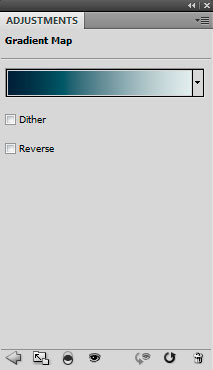
Add a gradient map adjustment layer. You can pick another color if you like; I chose petrol blue for a cold feel.
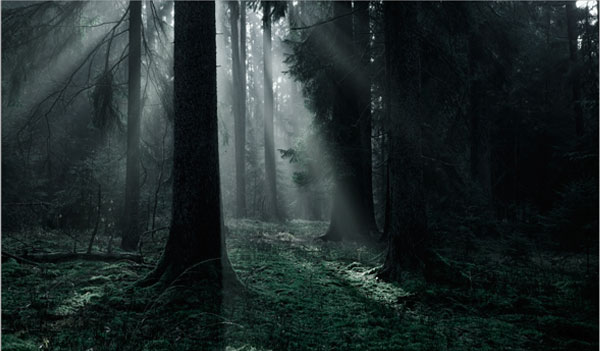
Now your image should look something like this:
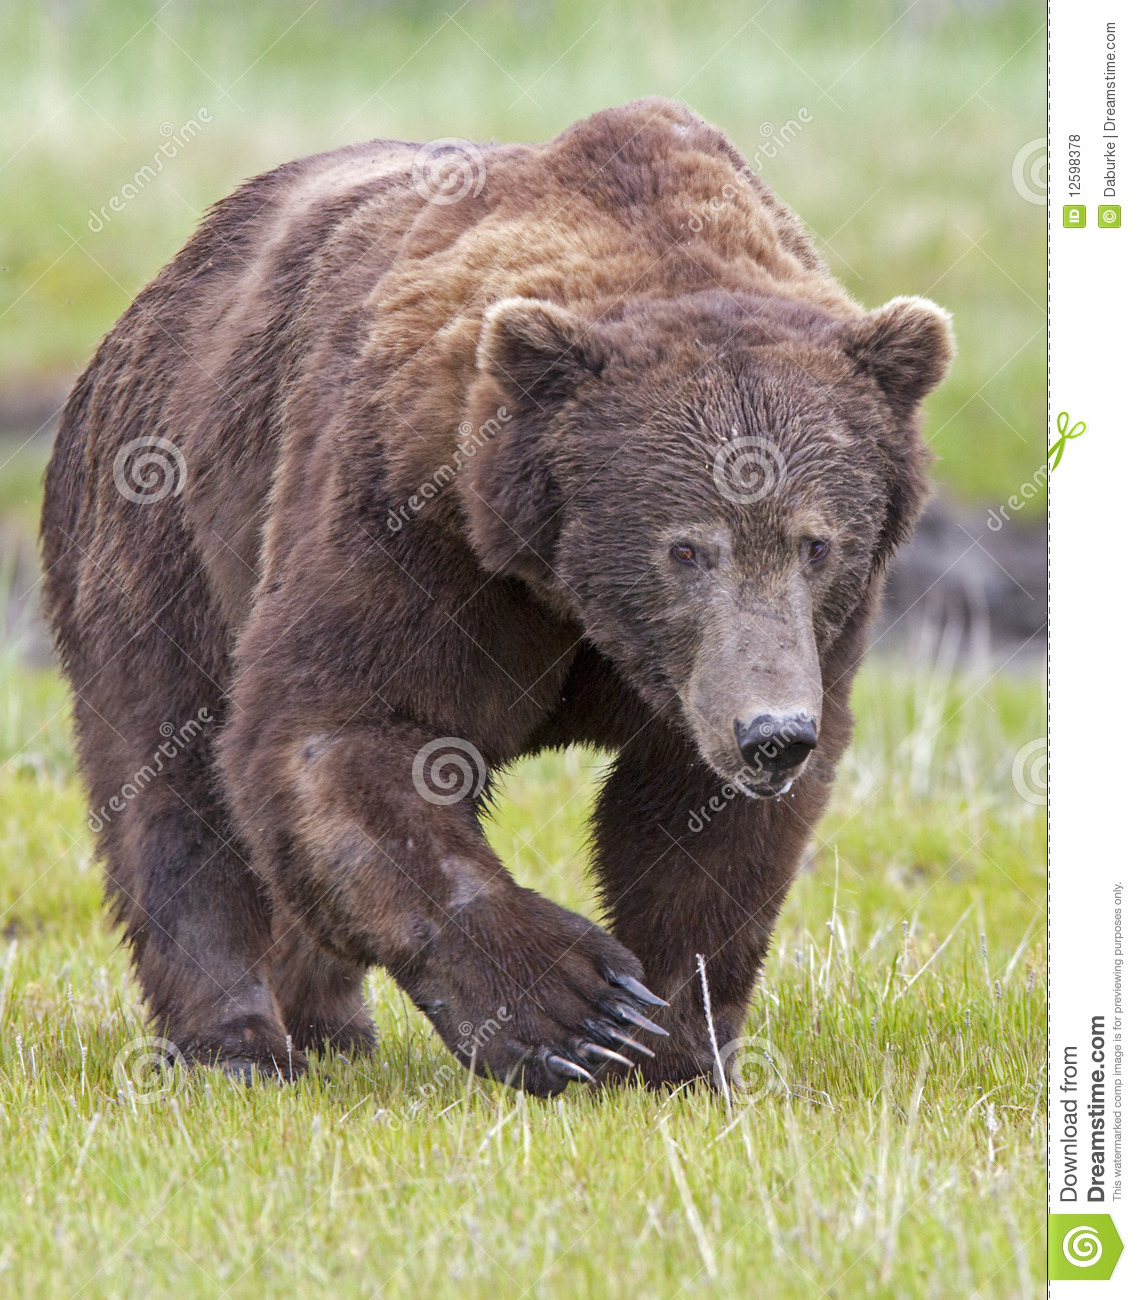
Step 5
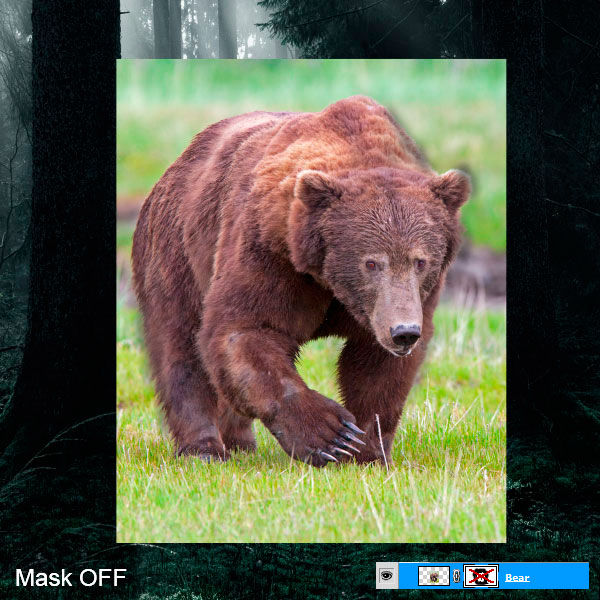
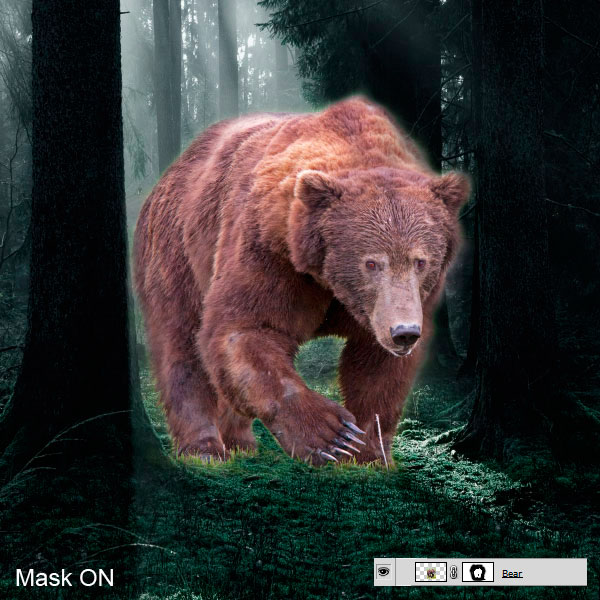
Next add the picture of a bear. To cut out the bear you can use the pen tool (P) or any other technique, but because of the grass in this picture I found out that the best way to cut it out was just to mask the grass. It will take some time but the end result looks much better than by using the pen tool.
To mask the grass, first add a vector mask to the bear layer. With the mask selected, mask the surroundings with a black brush. Use a small brush for the fur on the edges. When you are done, copy the layer twice for later use.
Step 6
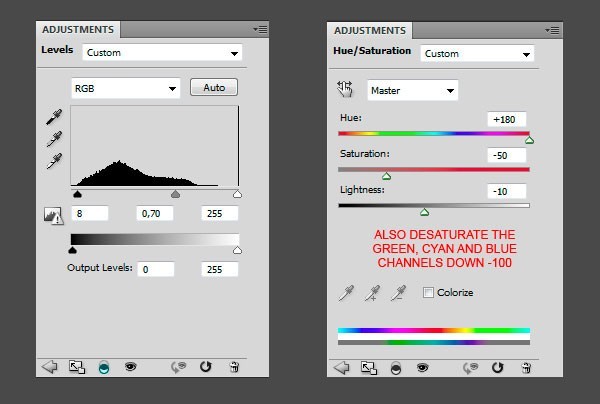
Now add adjustment layers for the bear. Make a new levels adjustment layer with the settings: 8, 0.70 and 255. Add a Hue/Saturation adjustment layer and bring down the master channel by -50. Also desaturate the yellow, green, cyan and blue channels by -100.
Step 7
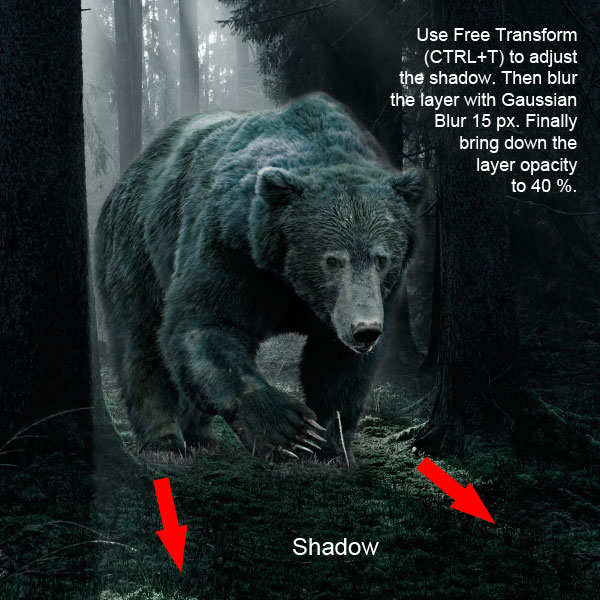
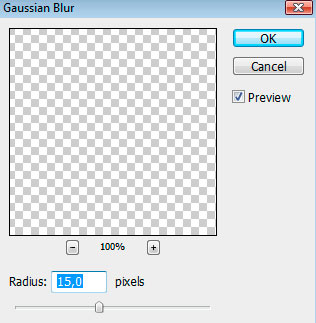
To create shadows for the bear, choose one of the copied bear layers, left-click and select Convert to Smart Object. Left-click again and select Rasterize Layer. Make sure that the layer is selected and go to Layer > Transform > Flip Vertical. Use free transform to adjust the shadow to its place (Cmd + T). Hold down Cmd when in free transform to adjust the angle of the shadow. Select Filter > Blur > Gaussian Blur, with a Radius of 15 px, to soften the shadow. Finally bring down layer opacity to 40%.
Step 8
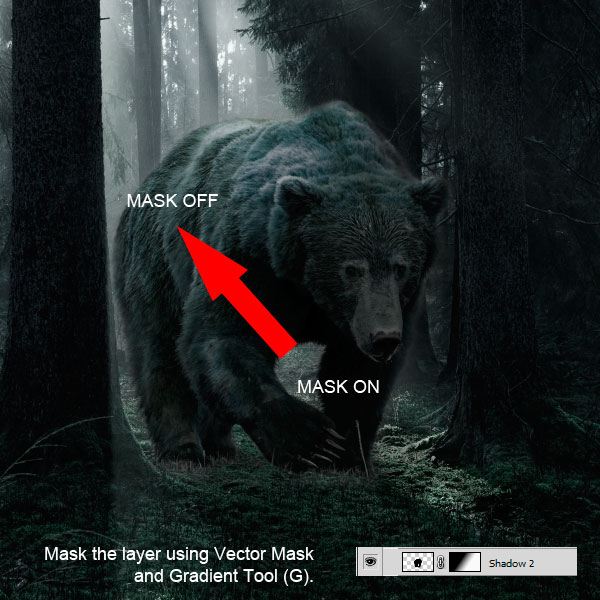
Now select the second copied bear layer and press Cmd + U to bring out the Hue/Saturation panel. Bring down the lightness to -100. Add a vector mask for the layer and use the gradient tool to draw the mask. Make sure that the gradient tool is set to default (from black to white).
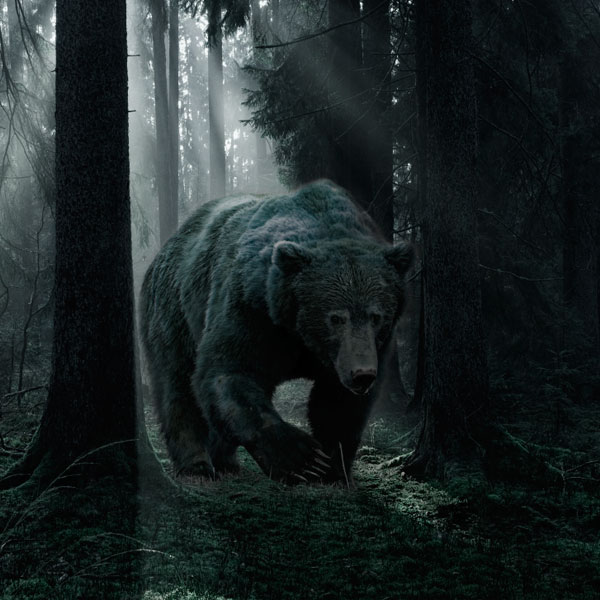
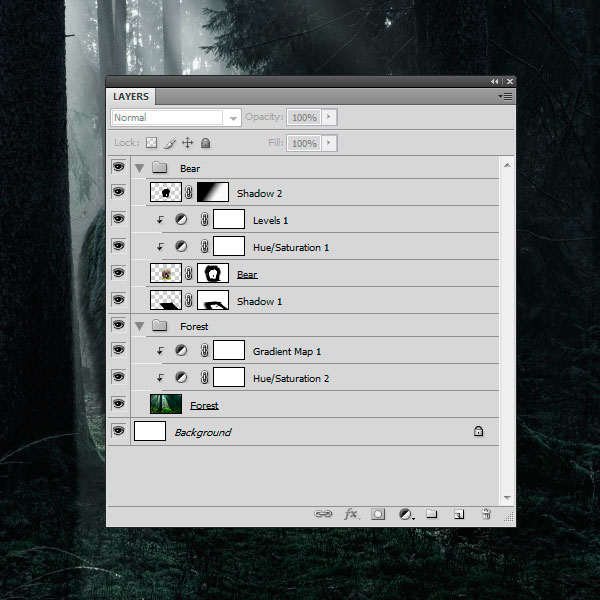
Now the forest and the bear have been blended together. Your image and your layer panel should look something like this:
Step 9
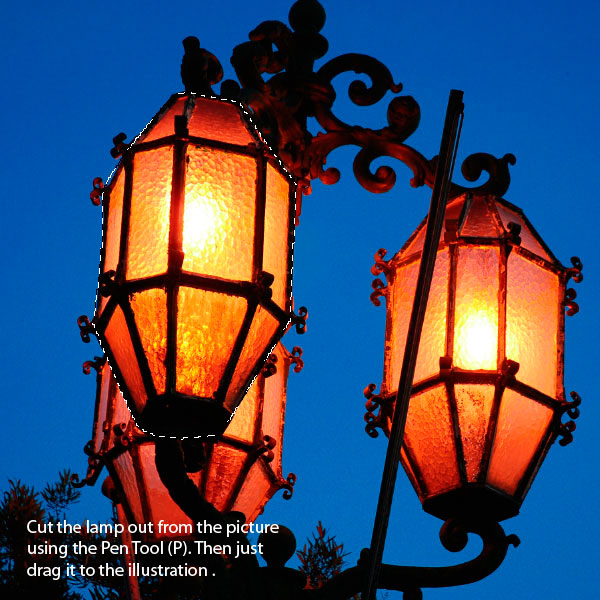
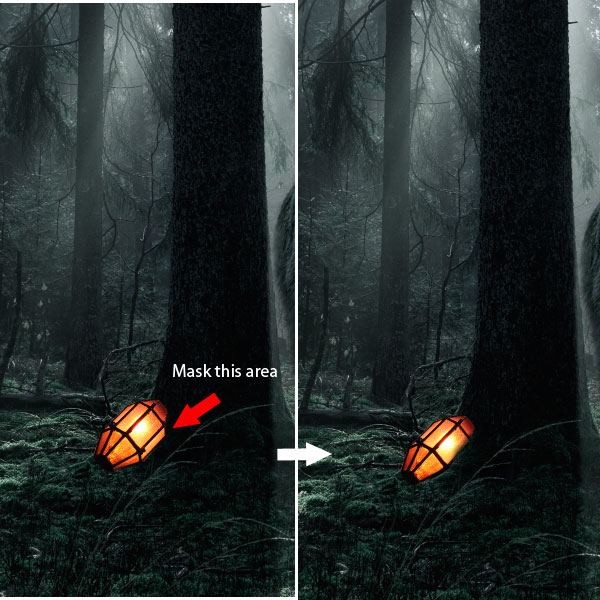
Open the lamp picture. Cut out a lamp by using the pen tool. Drag the selection to the main illustration and duplicate it. Now place the other lamp to the ground next to a tree and use a vector mask to make it look like it’s behind the tree’s roots. Use free transform to adjust the size of the second lamp and place it to the tree on the right side.
Step 10
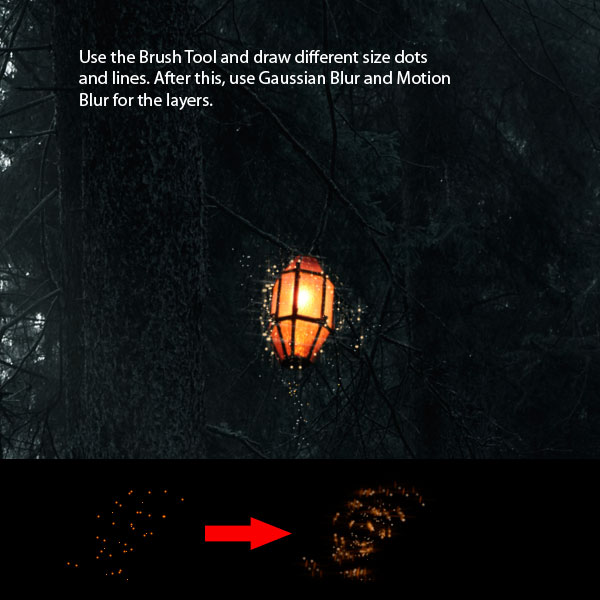
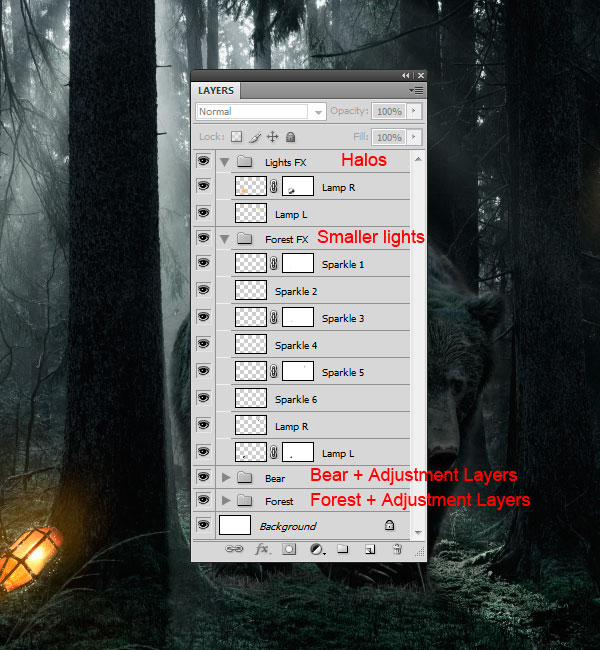
Create a new layer and select the brush tool with a color that matches with the lamps’ light. Start drawing different sized dots and lines around the lamps with a small brush. When you’re done, use Gaussian blur and motion blur on the layer to make it look more vivid. Duplicate the layer as many times as you wish and play around with layer opacity and blending modes if you like. Do this for both lamps.
Step 11
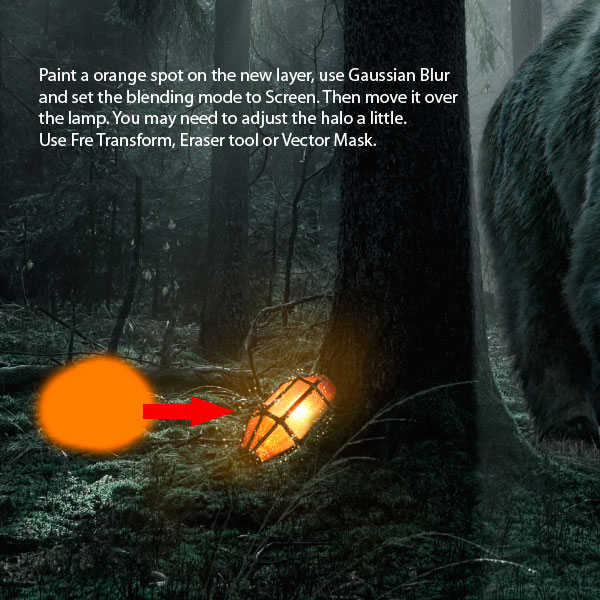
Add some more light around the lamps. Make a new layer; pick an orange/yellow color and paint around the left lamp. Use Gaussian blur and set the blending mode to screen. Set the opacity to 30%. Do the same thing for the right lamp, but set the opacity 15%.
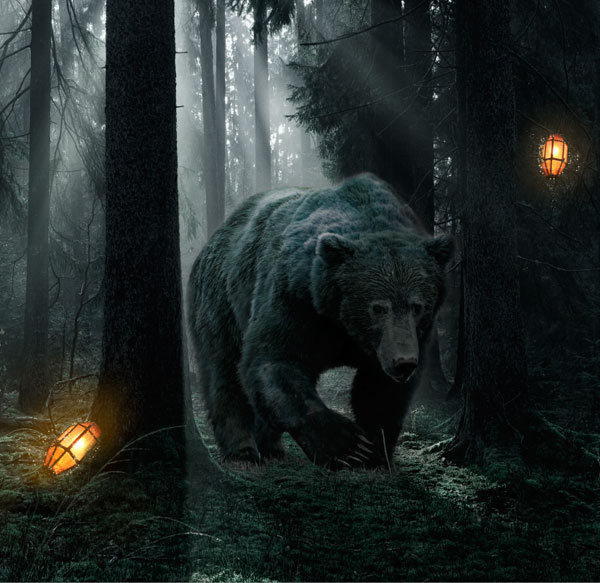
Here’s what your work should look like:
Step 12
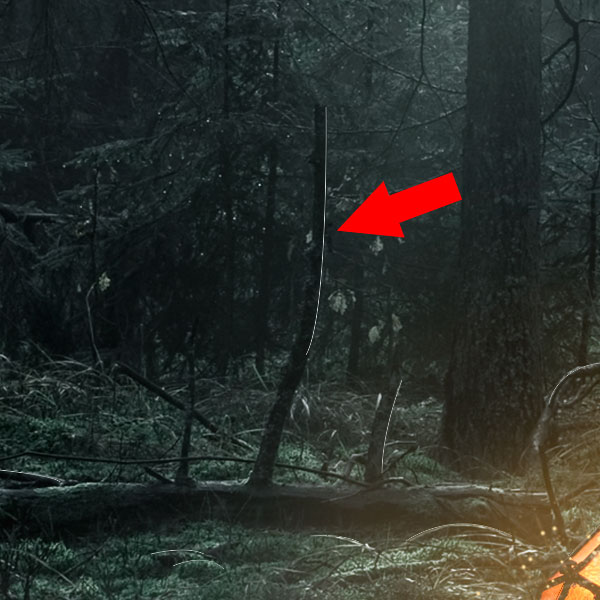
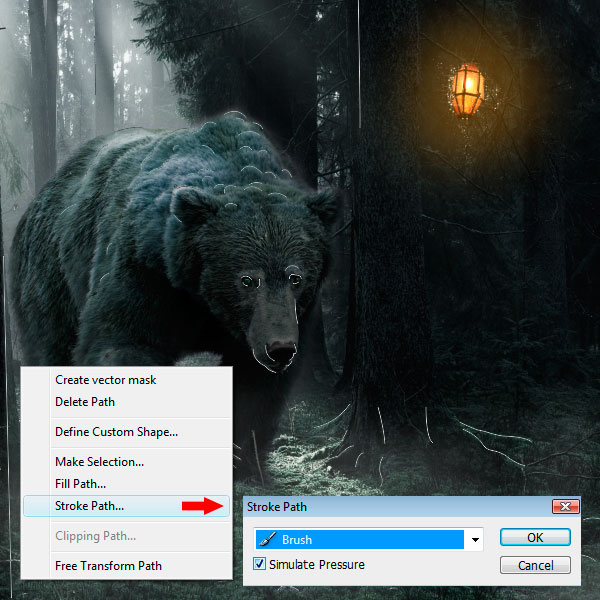
Now enhance some of the lines in the illustration. Make a new layer and select the brush tool with foreground color set to white. Set the brush size to 4 px and hardness to 100%. Start drawing lines that follow the shapes in the illustration. You can paint a lot or just focus on the bear. When you’re done, left-click one of the lines and select Stroke Path. Choose Brush and Simulate Pressure. Left-click the lines again and select Delete Path. Make a vector mask for the layer and start to mask them out so that they blend nicely but still clearly highlight your illustration.

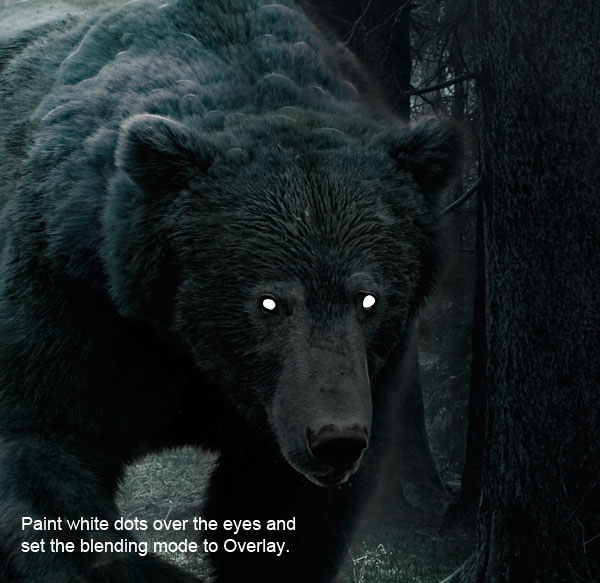
Step 13
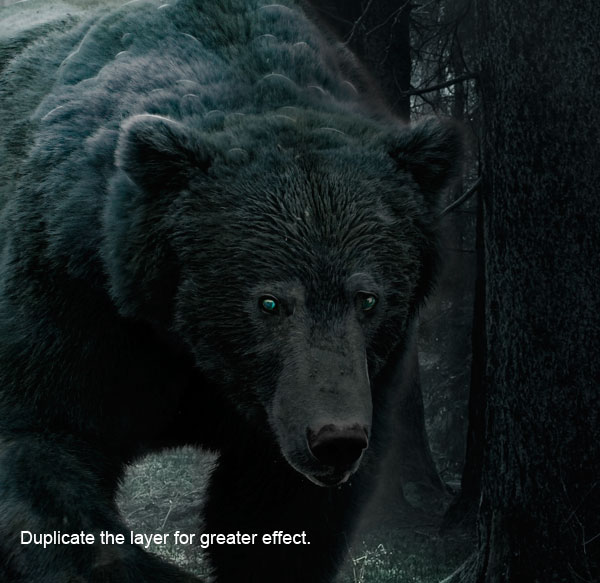
Bring out the bear’s eyes by painting white dots over the eyes using the brush tool. Duplicate the layer, and set the blending modes to overlay.
Step 14
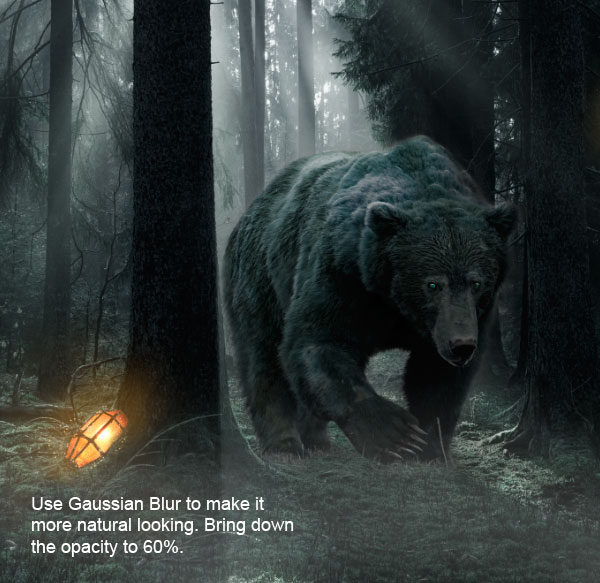
Add some mist in the front. Once again we’re going to use the good old brush tool. Paint with white, use Gaussian blur and bring down the opacity to around 60%.

Step 15
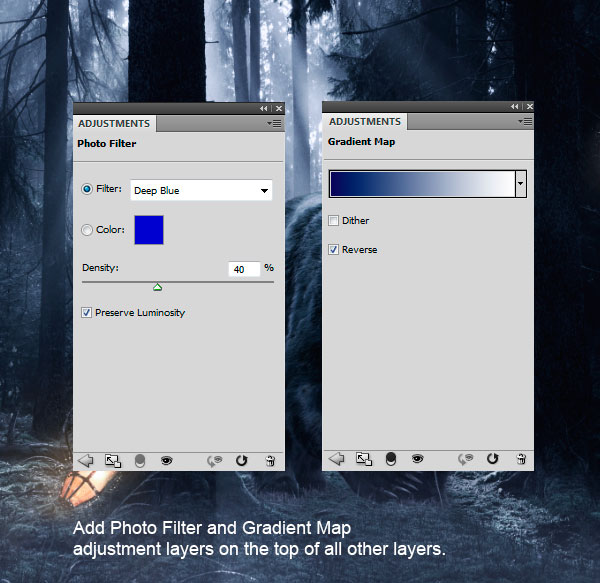
Almost done! Let’s add some finalizing touches. At the very top of the layer panel, add a Photo Filter adjustment layer. For the filter, select deep blue and set density to 40%. Then add a Gradient Map adjustment layer. Make it go from dark blue to white and set the blending mode to overlay.
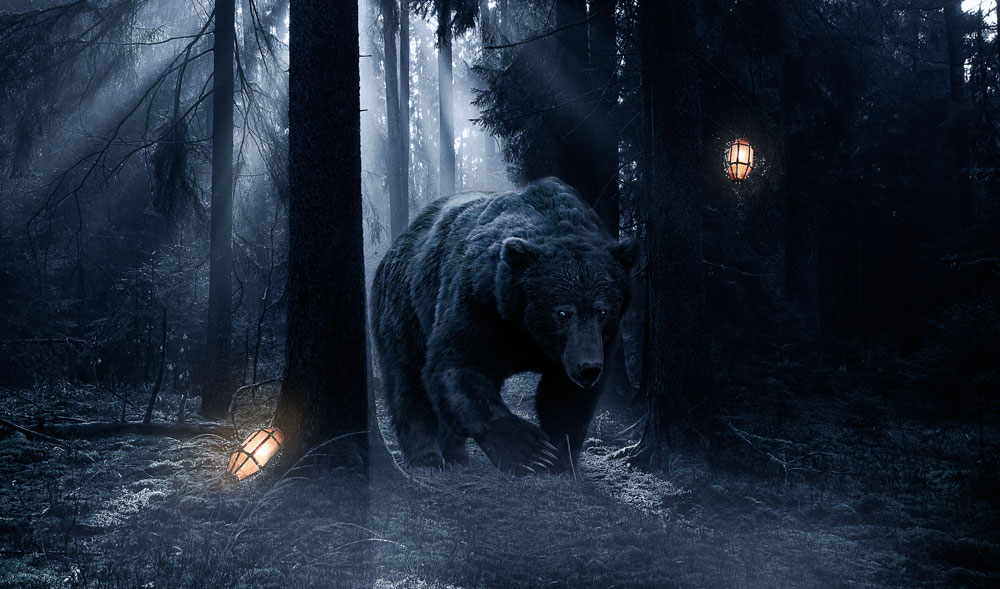
Final Image
And bang, you’re done! You can keep working with the lighting, add some more stuff in there or change the colors as you wish. I hope that you learned something useful with this tutorial.
All done! 🙂


