
Transform any typeface with this great looking grunge effect in Photoshop, much like the awesome Band of Brothers and 28 Days Later logos. The weathered look is highly customisable, and each result is totally unique – based on the trick that an image is used as a “destroy” mask. This ones a goldie oldie that Ive used for a long time now, but the technique has been refined a bit over the last year. So I thought I’d share!
Step 1
Base text… In your Photoshop document, create some white text and rasterize the type (right click on layer, select ‘rasterize’ type). Im really liking Helvetica Ultra Compressed at the moment – so Ive used that for my example! This background was created using textures from the awesome of any textures site.

Step 2
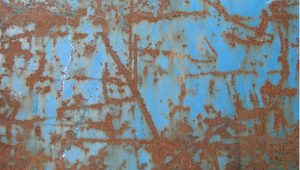
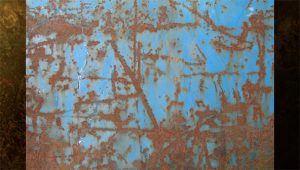
Choose a destroy mask… The idea behind this technique is to choose an image that can be used as a grunge layer… Have a look online and find an image that suits your requirements. The great thing about this process is that absolutely anything can be used, but some images are better than others. Pics with strong horizontal lines work to great effect, in my example I’ve used a scratched metal texture from the Internet.
Step 3
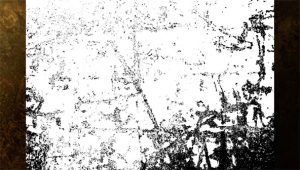
Threshold… Paste your chosen grunge image into the document, above the type layer.
With your grunge layer selected, open up the Threshold dialog via Image > Adjustments > Threshold. Choose a Threshold level that produces a good looking result, the blacks will be the parts that ‘eat’ into your text.

Step 4
Clear the white… To get rid of the white parts of the grunge layer go Select > Colour Range, when the dialog pops up set the Fuzziness to 200 and select a pure white area with the dropper. This will create a selection around everything that is white – hit delete, leaving you with just the grunge.

Step 5
Tweak as necessary… Theres lots that you can do with the grunge layer – you can rotate it, duplicate it to add more destruction to other parts of the text or simply move it to a more suitable position.
Step 6
Delete… Create a selection of your grunge layer (Ctrl / Cmd + click on the grunge layer). Go to the Type layer and hit delete. Hide the grunge layer (click eye icon on layer palette), you will be left with your type layer with the destroy effect applied.

Step 7
Bonus tip… Want to get that gnarly Horror movie look with your new destroy text? Give this a whirl.. Set your destroy text to Overlay Layer Mode, and duplicate the layer (Right click Layer, select Duplicate Layer). The intensity of this effect will depend on your background – so keep duplicating your destroy text layer (set to Overlay) until you get the amount of punch that you require. In my example I used 4 copies of the layer (set to Overlay), with one copy at the bottom of the stack set to Normal Layer Mode, Opacity 1% (because my background was very dark).


